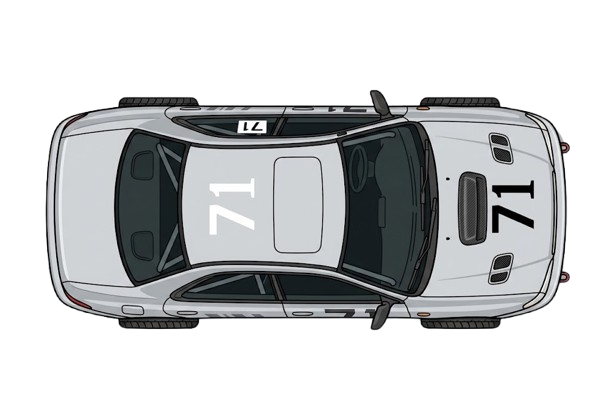
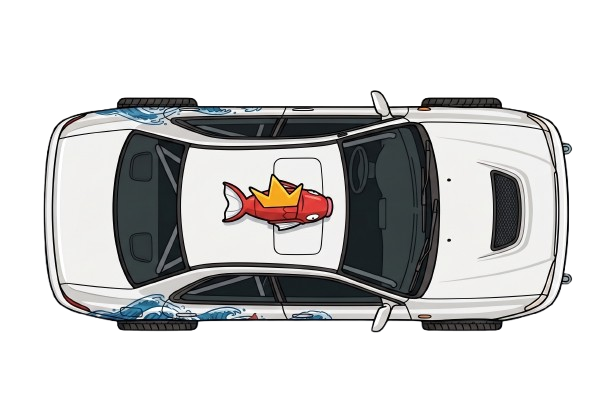
A retard in motion is better than a genius at rest
The Timeline
This was typed by humans. We promise.
A complete record of every wrench turn, every bolt torqued, and every part swapped on the build. We have receipts. Probably.
Phase 1 — Strip Down
Before anything goes in, everything comes out. We gutted the interior down to bare metal to drop weight and prep the shell for cage fitment.
Day 1
Documented the car's baseline condition — photographed every panel, interior surface, and engine bay angle for reference.
Disconnected the negative battery terminal (10 mm socket) and isolated the wiring harness at the main junction behind the glovebox.
Drained all fluids: engine oil (4.5 qt), coolant (approx. 6.3 qt), and brake fluid reservoir siphoned down to minimum.
Removed the front and rear floor mats, cargo net, spare tire, jack assembly, and OEM tool kit from the trunk well.
Day 2
Pulled the front seats: four 14 mm bolts per seat, disconnected the seat-belt pre-tensioner harness plugs before lifting each seat clear of the chassis rails.
Removed the center console — two Phillips screws under the cupholder liner, two 10 mm bolts at the rear mount, and one hidden clip beneath the shift boot surround.
Stripped the dashboard: started with the lower knee-bolster (three 10 mm bolts), then the instrument cluster surround (four Phillips), glovebox (six 10 mm bolts along the hinge rail), and finally the main dash carrier (eight 12 mm bolts plus two 10 mm support brackets).
Unplugged the HVAC blower connector and heater core hoses at the firewall — capped the heater core ports with silicone plugs to prevent coolant weep.
Day 3
Removed the rear bench seat: lifted the base off two spring clips, then unbolted the backrest (three 14 mm bolts along the lower mount).
Pulled all four door cards — each held by two Phillips screws inside the grab handle, one behind the door-lock bezel, and six push-pin clips around the perimeter. Disconnected the window-switch harness before pulling each card free.
Dropped the headliner: removed both sun visors (two Phillips each), the dome-light housing (squeeze tabs), the rear-view mirror mount (single Torx T20), and all A-/B-/C-pillar trim clips. Folded the headliner out through the rear hatch.
Stripped the carpet and jute sound-deadening mat from the floor pan — used a heat gun at 350 °F on the factory butyl patches and scraped them clean with a 3" putty knife.
Day 4
Removed the trunk liner panels (eight push-pin clips and two Phillips screws) along with the spare-tire well foam insert.
Unbolted the rear parcel shelf and its two support brackets (four 10 mm bolts total).
Pulled the factory stereo head unit and all four door speakers — each speaker secured by three Phillips screws into stamped-steel brackets.
Peeled the remaining sections of factory sound deadening from the trunk floor, wheel wells, and firewall — approximately 14 lbs of material removed total.
Final strip weigh-in: removed roughly 185 lbs of interior material from the shell. Car sitting on bare painted floor pan, ready for engine service before cage fitment.
Phase 2 — Engine Deep Service
Front-engine maintenance with the shell stripped. Timing belt, water pump, and oil pump while the crank pulley is off, plus intake and electrical soft checks — all locked in before cage welding starts.
Day 5
Replaced the engine air filter — seated the new element square in the housing and confirmed the lid latches without crushing the seal.
Cleaned the throttle body and MAF with dedicated sprays — TB bore and plate wiped free of varnish; MAF sensor cleaned per product instructions, no contact with the sensing element.
Baseline parasitic battery drain check with a multimeter in series on the negative cable — recorded key-off draw after modules sleep; flagged any circuit above the team's acceptable threshold for chase before continuing.
Day 6
Opened the front of the engine for deep service — accessory belt off, harmonic balancer / crank pulley bolt broken loose with the engine locked per the service documentation.
Removed the crank pulley with the correct puller (no pry bars on the nose) — tagged fastener orientation and retained any OEM washers or keys for reassembly.
Inspected the crank snout and seal area before proceeding to oil-pump and timing work — front cover access now clear.
Day 7
Replaced the oil pump and oil pump gasket with the front cover open — mating surfaces cleaned, gasket seated dry or sealed per service spec, fasteners torqued in pattern.
Replaced the water pump while the front was open — old pump and gasket scraped clean, new unit installed with fresh coolant-sealing hardware, ready to share the timing-belt reassembly.
Verified oil and coolant galleries were clear of debris before covering the front of the engine again.
Day 8
Replaced the timing belt — cams and crank timed to factory marks, tensioner set per service documentation, belt routed without pinch or twist.
Reinstalled the crank pulley and front covers — pulley bolt torqued to spec with threadlocker or stretch bolt procedure as required; accessory belt refitted.
Refilled oil and coolant, fired the engine, and confirmed oil pressure, belt tracking, and no seepage at the pump gasket or front seal.
Engine sealed and soft checks complete. Shell ready for cage fitment.
Phase 3 — Roll Cage Fabrication & Install
Mild-steel roll cage, notched and TIG-welded to the shell. Every joint ground, fish-mouthed, and gusseted to spec before paint.
Day 9
Cut the main hoop from 1.75" × 0.095" DOM mild-steel tubing — measured pillar-to-pillar at the B-pillars (49.5" interior width) and marked the bend radii with soapstone.
Bent the main hoop in a hydraulic bender: two 90° bends with a 3" CLR die, leaving 48" of straight top span and two 36" legs.
Notched the foot plates with a hole-saw jig (1.75" bi-metal) and ground each fish-mouth to a flush fit against the floor-pan reinforcement plates.
Tack-welded the main hoop feet to 4" × 4" × 3/16" base plates, then tacked the base plates to the floor pan at the B-pillar locations — four tacks per plate, verified plumb with a digital level (0.2° tolerance).
Day 10
Fabricated two A-pillar down-tubes from 1.5" × 0.095" DOM tubing — measured 62" each from the top corners of the main hoop to the mounting points on the front-strut towers.
Notched the upper joints at 38° to match the hoop radius and tack-welded them to the main hoop with a 1/8" gap for full-penetration TIG passes.
Cut and bent the dash bar (1.5" × 0.095" DOM) — a single straight tube spanning 46" between the two A-pillar tubes, positioned 2" below the original dash line.
Welded 3/16" gusset plates at each A-pillar-to-hoop junction — triangular gussets, 4" legs, TIG-welded with ER70S-2 filler at 130 amps on DCEN.
Day 11
Fabricated two rear braces from 1.5" × 0.095" DOM tubing — routed from the top of the main hoop at 32° rearward down to reinforcement plates welded onto the rear strut towers.
Welded the rear brace feet to 4" × 4" × 3/16" base plates and bolted each plate to the strut tower with four M10 × 1.25 Grade-10.9 bolts torqued to 45 Nm.
Installed the harness bar: a 1.75" × 0.095" straight tube spanning between the rear braces, 4" below the top of the main hoop — positioned for correct shoulder-harness angle (10°–20° below shoulder line).
Added two diagonal cross-braces (X-brace pattern) between the rear braces using 1.25" × 0.083" tubing — each tube notched, tacked, then fully welded with continuous beads.
Day 12
Bent and fitted two door bars per side (four total) from 1.5" × 0.095" DOM tubing — each bar follows a gentle outward bow (1.5" max deflection at center) to clear the driver's hip zone.
Welded all remaining tack joints to full-penetration beads: main hoop feet, A-pillar junctions, door-bar ends, and harness-bar saddles — approximately 48 linear inches of weld per side.
Ground every weld bead flush with a 40-grit flap disc, inspected for porosity or undercut, and re-welded two small pin-holes found on the left A-pillar gusset.
Scuff-sanded the entire cage with 120-grit, wiped down with acetone, and applied two coats of semi-gloss black chassis paint — 24-hour cure time between coats.
Phase 4 — Race Seats & Harnesses
FIA-rated bucket seats on sliders, five-point harnesses routed through the harness bar, and fresh mounting hardware throughout.
Day 13
Test-fitted the driver-side seat bracket on the factory floor-pan mount studs — drilled two additional 10 mm holes to match the bracket's four-bolt pattern.
Installed seat-rail sliders to the bracket using four M8 × 1.25 × 20 mm bolts with Nord-Lock washers — torqued each bolt to 25 Nm in a cross pattern.
Applied Loctite 243 (medium-strength threadlocker) to every seat-mount fastener to prevent vibration-induced loosening on track.
Repeated the same bracket-and-slider process for the passenger side, verifying equal seat height (±3 mm) with a laser level spanning both rails.
Day 14
Lowered the driver's FIA bucket seat onto the slider rails and secured it with four M8 × 1.25 bolts — torqued to 25 Nm, then verified each bolt with a paint-pen witness mark.
Set the driver-seat slider position: adjusted fore-aft until the driver's outstretched arm could rest a wrist on the top of the steering column with shoulders flat against the seat back.
Installed the passenger-side seat using the same torque sequence and verified alignment by sighting both headrest tops level from behind the car.
Fitted anti-submarine straps to the seat bases — each strap bolted through the seat's sub-strap slot and anchored to a 3/16" reinforcement plate welded to the floor pan, M10 bolt torqued to 40 Nm.
Day 15
Mounted the shoulder straps to the harness bar using forged-steel harness wrap-around brackets — two M12 bolts per bracket torqued to 50 Nm with hardened washers.
Routed the lap belts down from the seat sides to the factory seat-belt anchor points on the floor-pan tunnel — existing M12 studs reused, cleaned threads and torqued to 38 Nm.
Adjusted shoulder-strap angle to 15° below the driver's shoulder line — measured with a digital inclinometer placed along the strap from harness bar to seat shoulder opening.
Tested the cam-lock buckle release mechanism 25 times — confirmed clean engagement and sub-1-second release on every pull.
Phase 5 — Steering Wheel Swap
OEM wheel off, quick-release hub on, lightweight flat-bottom wheel installed and centered.
Day 16
Disconnected the battery (negative terminal) and waited 15 minutes for the SRS capacitor to discharge before touching any airbag components.
Removed the driver airbag module — two Torx T30 bolts accessed from the rear of the steering wheel spokes, then gently pulled the module forward and disconnected the yellow SRS connector with the locking tab lifted.
Marked the steering-wheel-to-column alignment with a paint pen across the splines to preserve steering center.
Removed the center nut (21 mm, ~45 Nm from factory) and pulled the OEM steering wheel off the column using a three-jaw puller — light penetrating oil on the splines helped break it free.
Day 17
Installed the splined hub adapter onto the column — aligned the adapter's index mark with the paint-pen mark on the column splines and threaded the center nut on finger-tight.
Torqued the hub-adapter center nut to 35 Nm, then verified the adapter seated flush against the column shoulder with no axial play (checked by hand for rock).
Snapped the quick-release mechanism onto the hub adapter — confirmed the ball-bearing detent locked at three positions with an audible click, and verified the pull-ring released cleanly.
Bolted the flat-bottom steering wheel to the quick-release using six M5 × 0.8 × 16 mm Allen-head bolts — torqued in a star pattern to 9 Nm each.
Performed a steering-center check: with the front wheels pointed dead ahead on a flat surface, the wheel's center marker sat within 2° of 12-o'clock — acceptable without realignment.
Setback — Steering & Seat Conflict
First time sitting in the car with the new seats and new wheel together. It didn't work. The quick-release hub pushed the wheel 45 mm further out than the OEM column, and the flat-bottom rim caught the edge of the driver's seat bolster on full lock-to-lock turns. Back to square one on the steering — seats have to move first.
Day 18
Driver sat in the finished cockpit for the first ergonomic check — immediately noticed the steering wheel rim contacted the left seat bolster when turning past 270° of lock.
Measured the gap between the wheel rim at full left lock and the bolster foam: –8 mm (negative — the wheel was physically pressing into the bolster). Completely unworkable for track driving.
Root cause identified: the quick-release hub assembly added 45 mm of dish beyond the OEM column length, bringing the wheel plane back toward the seat. Combined with the wider FIA bucket bolsters (60 mm wider per side than OEM seats), the wheel envelope now overlapped the seat.
Explored quick fixes — a deeper-dish wheel would push the rim further from the column but make the reach even worse. A shorter hub adapter would fix the clearance but wasn't available in the correct spline count. Only real fix: move the seat.
Called it for the day. Ordered a 15 mm drop-bracket spacer kit and longer M8 × 1.25 × 30 mm mounting bolts to lower and set the seat further back.
Day 19
Removed the flat-bottom wheel from the quick-release — backed out all six M5 Allen bolts and set the wheel aside on a clean shop towel, face down.
Pulled the quick-release mechanism off the hub adapter — depressed the pull-ring and slid it free. Bagged the ball bearings and detent spring separately in a labeled zip bag.
Loosened the hub-adapter center nut (21 mm) from 35 Nm and slid the adapter off the column splines. Wrapped the exposed splines with masking tape to protect them during the seat work.
Total teardown time: 25 minutes. Everything that took a full day to install came apart in under half an hour — frustrating but necessary.
Day 20
Unbolted the driver's seat from the slider rails — four M8 bolts backed off, paint-pen witness marks cracked (these were only a week old). Lifted the seat out of the car.
Removed the slider rails from the original bracket — four M8 × 1.25 × 20 mm bolts with Nord-Lock washers. Set aside for reuse.
Installed the 15 mm drop-bracket spacers between the floor-pan mounts and the seat bracket — this lowers the seat 15 mm and shifts the rail mounting holes 20 mm rearward compared to the original position.
Bolted the spacers to the floor using the original studs plus the new M8 × 1.25 × 30 mm bolts (longer to account for the spacer thickness) — torqued to 25 Nm with fresh Loctite 243.
Reattached the slider rails to the new bracket position and lowered the seat back onto the rails — four M8 bolts torqued to 25 Nm in a cross pattern, new paint-pen witness marks applied.
Sat in the seat and checked clearance against an imaginary wheel plane (held a 350 mm circle of cardboard at the hub centerline): 22 mm of clearance on the left bolster at full lock — well within the minimum 15 mm target.
Re-checked the anti-submarine strap anchor — the 15 mm drop didn't change the strap geometry enough to require re-drilling. Strap angle still within the 45°–75° window.
Day 21
Removed the masking tape from the column splines, cleaned the spline teeth with a brass brush, and applied a light coat of anti-seize to the shaft.
Re-installed the hub adapter — aligned the index mark to the column paint-pen mark (same reference from Day 16), threaded the center nut finger-tight, then torqued to 35 Nm.
Snapped the quick-release back onto the adapter — reinstalled the ball bearings and detent spring from the labeled bag, confirmed three-position locking click.
Bolted the flat-bottom wheel to the quick-release — six M5 × 0.8 × 16 mm Allen bolts torqued in a star pattern to 9 Nm.
Full ergonomic sweep: turned the wheel lock-to-lock with the driver seated — 22 mm clearance to the left bolster, 30 mm to the right bolster. No contact at any angle. Problem solved.
Re-checked steering center: wheel center marker at 12-o'clock with front wheels dead ahead — within 1° this time thanks to the clean spline re-engagement. Better than the first install.
Driver reach test: outstretched arm wrist rests on the top of the wheel with shoulders flat against the seat back and slight bend in the elbows. Pedal reach confirmed with heel on the dead pedal and ball of foot covering the brake — all good.
Signed off on the steering-and-seat integration. Lesson learned: always mock up seat + wheel together before torquing anything down.
Phase 6 — Brake Pads (All Four Corners)
Factory pads out, high-temp track compound pads in. Calipers cleaned, slides re-greased, and everything torqued to spec.
Day 22
Lifted the front end on jack stands (pinch weld pads) and removed both front wheels — lug nuts broken loose at 103 Nm before lifting, then spun off by hand.
Removed the front caliper slide-pin bolts (two 14 mm bolts per caliper, ~35 Nm from factory) and swung the caliper body upward, hanging it from the spring with a wire hook to avoid stressing the brake line.
Pulled the old pads from the bracket ears, measured remaining friction material at 2.8 mm (driver side) and 3.1 mm (passenger side) — both below the 4 mm minimum for track use.
Compressed the caliper pistons with a C-clamp and an old pad as a backer — opened the bleeder valve 1/4 turn during compression to avoid pushing dirty fluid back through the ABS module.
Cleaned the bracket pad ears and slide-pin bores with brake cleaner, then applied fresh high-temp caliper grease to both slide pins and the pad-ear contact surfaces.
Installed the new high-temp compound front pads (rated to 650 °C), re-seated the caliper, and torqued the slide-pin bolts to 35 Nm.
Day 23
Lifted the rear end and removed both rear wheels. Inspected the rear rotors — measured thickness at 9.8 mm (minimum spec 9.0 mm), light scoring only, rotors serviceable.
Removed the rear caliper slide-pin bolts (two 12 mm bolts per caliper, ~30 Nm factory spec) and swung each caliper clear.
Pulled the old rear pads — remaining friction material measured at 3.4 mm (driver side) and 3.6 mm (passenger side). Within OEM spec but below track threshold.
Rear caliper pistons required a screw-in tool (clockwise rotation) due to the integrated parking-brake mechanism — turned each piston 180° while applying light inward pressure until fully seated.
Installed the new rear pads (same high-temp compound as fronts), reassembled the calipers, and torqued rear slide-pin bolts to 30 Nm.
Pumped the brake pedal 15–20 times to re-seat all four caliper pistons against the new pads — pedal firmed up after the sixth pump. Verified no fluid leaks at any bleeder or banjo fitting.
Day 24
Performed a pad bedding cycle on a closed section of lot: ten moderate stops from 60 km/h to 15 km/h with 30-second cool-down rolls between each stop.
Followed with three firm stops from 95 km/h to 15 km/h to build pad-deposit transfer onto the rotor face.
Allowed a 15-minute cool-down at idle — no dragging the brakes, no coming to a full standstill on hot rotors.
Post-bedding inspection: checked rotor faces for even blue-grey transfer film, verified no hot spots or glazing. Both front and rear pads showed full-face contact marks.
Phase 7 — Clutch Replacement
Transmission dropped, flywheel resurfaced, new clutch disc, pressure plate, throwout bearing, and pilot bearing pressed in.
Day 25
Raised the car on four jack stands and placed a transmission jack beneath the bellhousing — secured with a ratchet strap around the case.
Drained the transmission fluid (~2.5 qt) into a catch pan by removing the drain plug (24 mm hex, ~40 Nm from factory).
Disconnected the clutch hydraulic line at the slave cylinder fitting — capped the hard line with a rubber vacuum cap to minimize fluid loss.
Unbolted the shift linkage from the transmission — two 12 mm bolts on the shift-rod bracket and one 10 mm pinch bolt on the selector shaft.
Disconnected the reverse-light switch connector, the vehicle-speed sensor plug, and the starter motor wiring (positive lead: 12 mm nut, ~12 Nm).
Removed the starter motor — two 14 mm bolts, ~55 Nm from factory. Set the starter aside on a shop towel.
Supported the engine from above with a load leveler on the hoist, then unbolted the rear transmission mount crossmember (four 14 mm bolts, ~65 Nm each).
Removed the bellhousing bolts in a perimeter sequence — six M12 × 1.25 bolts torqued at 65 Nm from factory, plus two M10 upper bolts at 50 Nm. Lowered the transmission straight back on the jack, clearing the input-shaft splines from the clutch disc without prying.
Day 26
Removed the pressure plate — six M8 × 1.25 bolts loosened in a star pattern one turn at a time to relieve spring pressure evenly. Final removal at ~25 Nm factory torque.
Pulled the old clutch disc and inspected it: friction material worn to 1.2 mm (below the 2.0 mm rivet-head depth), hot spots on three pads, and light scoring on the flywheel face.
Unbolted the flywheel — eight M10 × 1.25 bolts at 75 Nm factory spec, held the flywheel with a locking tool threaded into two bellhousing bolt holes.
Sent the flywheel out for resurfacing — machine shop took 0.3 mm off the face, bringing it back within the flatness spec of 0.05 mm run-out across the full friction surface.
Pressed out the old pilot bearing using a slide-hammer with a bearing puller collet — bearing came out in one clean pull.
Pressed the new pilot bearing flush into the crank bore using a bearing driver and dead-blow hammer — applied a thin film of moly grease to the outer race before seating.
Day 27
Bolted the resurfaced flywheel back onto the crank flange — eight M10 × 1.25 bolts with fresh Loctite 243, torqued to 75 Nm in a star pattern.
Centered the new clutch disc on the flywheel using a plastic alignment tool through the pilot bearing, spline side facing the transmission.
Installed the new pressure plate over the disc — six M8 × 1.25 bolts threaded finger-tight while the alignment tool held the disc centered, then torqued in a star pattern to 25 Nm.
Packed the new throwout bearing's contact surface with high-temp bearing grease and slid it onto the transmission input-shaft sleeve, confirming smooth fore-aft travel with no binding.
Raised the transmission on the jack, aligned the input shaft with the clutch disc splines, and slid the trans forward — the shaft engaged the pilot bearing with light hand pressure only (no forcing).
Threaded all bellhousing bolts in by hand to prevent cross-threading, then torqued: six M12 × 1.25 bolts to 65 Nm and two M10 uppers to 50 Nm, in the factory perimeter sequence.
Reinstalled the rear crossmember mount (four 14 mm bolts to 65 Nm), then removed the engine hoist support.
Day 28
Reinstalled the starter motor — two 14 mm bolts torqued to 55 Nm, reconnected the positive lead at 12 Nm and the signal wire push connector.
Reconnected the shift linkage — two 12 mm bracket bolts tightened to 22 Nm, pinch bolt on the selector shaft to 18 Nm. Verified full gate selection in neutral.
Reconnected the reverse-light switch, VSS sensor, and clutch hydraulic line — tightened the hydraulic fitting to 15 Nm (flare nut).
Refilled the transmission with 2.6 qt of 75W-90 GL-4 gear oil through the fill plug — filled until fluid wept from the fill-hole lip, then reinstalled the fill plug at 40 Nm.
Gravity-bled the clutch hydraulic system: opened the slave-cylinder bleeder valve, topped off the reservoir with DOT 4 fluid, and let it drip until a clear, bubble-free stream flowed. Closed the bleeder to 11 Nm.
Pumped the clutch pedal 30 times to confirm a firm, consistent engagement point at roughly 1/3 pedal travel — no sponginess, no chatter.
Lowered the car, started the engine, and tested all five gears plus reverse — shifts engaged cleanly with no grinding or abnormal noise.
Phase 8 — Final Checks & Sign-Off
Every fastener re-checked, safety equipment verified, and the car cleared for its first shakedown.
Day 29
Re-torqued all cage base-plate bolts: floor-pan plates verified at original weld spec, rear-brace strut-tower bolts confirmed at 45 Nm — no movement detected on any fastener.
Re-torqued all four seat-mount bolts (both sides) to 25 Nm and verified paint-pen witness marks unbroken.
Re-torqued the steering hub adapter nut to 35 Nm, confirmed quick-release detent engagement, and pull-ring release operation — three clean tests, all passed.
Checked brake caliper slide-pin bolts: fronts confirmed at 35 Nm, rears at 30 Nm. Inspected brake lines for chafe or contact with suspension components — all clear.
Inspected clutch hydraulic line routing for clearance against the exhaust and subframe — 15 mm minimum gap verified along the entire run.
Checked lug-nut torque on all four wheels — set to 103 Nm with a calibrated torque wrench, wheels hand-spun to verify no brake drag.
Bounced the car on all four corners to settle the suspension, rechecked ride height (even side-to-side within 5 mm), and confirmed no fluid leaks beneath the car after 30 minutes of idle.
Completed the build checklist, signed off on the log, and cleared the car for its first shakedown session.
Season 2
The car survived Season 1, so naturally we're going to modify it more. Here's what's on the list.
Suspension upgrades
Cold air intake
Improving radio communications and telemetry
Air freshener
Fixing a Control Arm
Every suspension job starts with a broken control arm and a bad idea. We took our inspiration from a rally legend, recreated the problem, and then, for better or worse, found a solution.